|
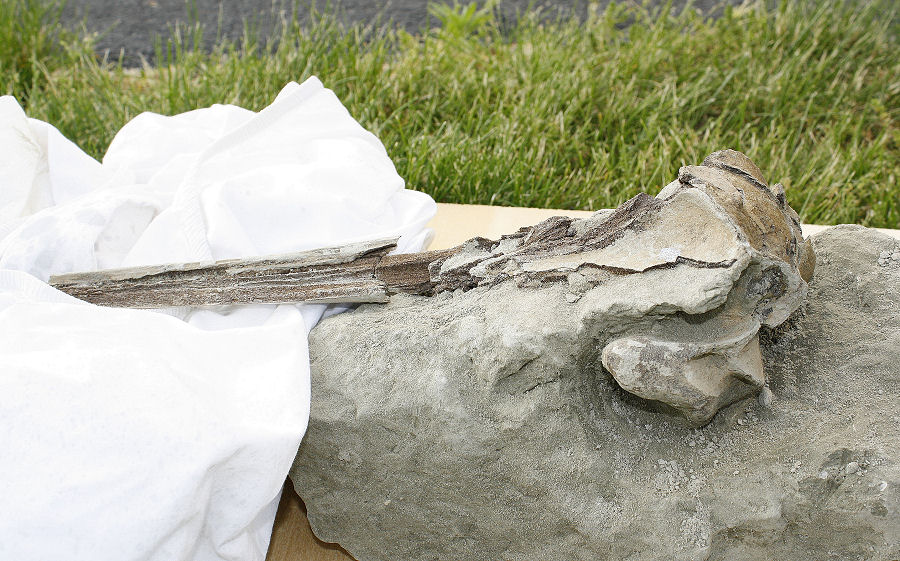
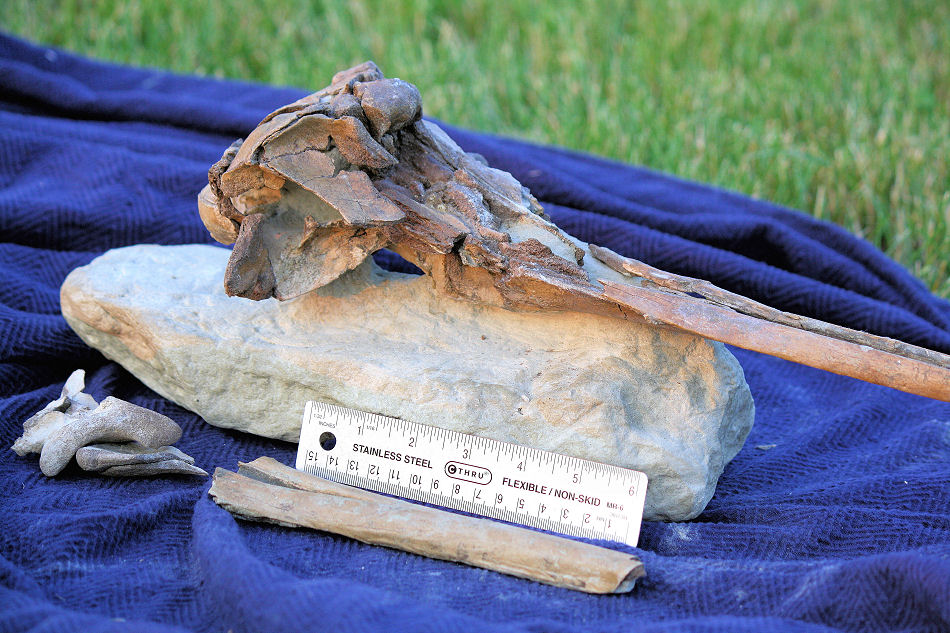
Dolphin Skull
04/30/2011
Schizodelphis
morckhoviensis
Calvert County, Maryland
Miocene
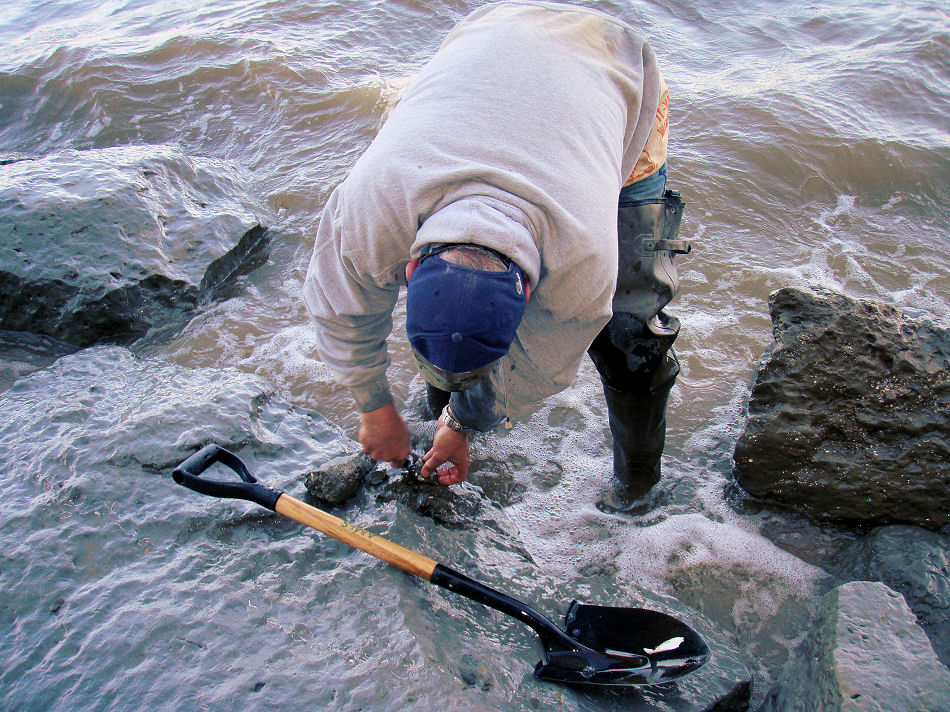
It was the end of a very
long day, the fact that I had played poker the night before
and then drove the hour plus South to catch a few hours
sleep in the Wa-wa parking lot before meeting my friends at
4:00 AM was taking it's toll. I was done for the day and was
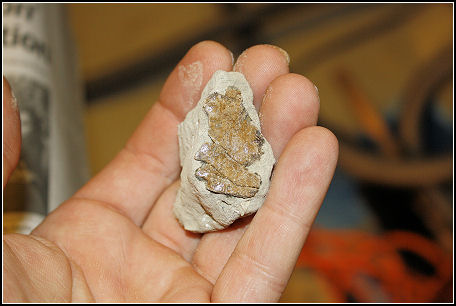
just poking around when I noticed what looked like a small
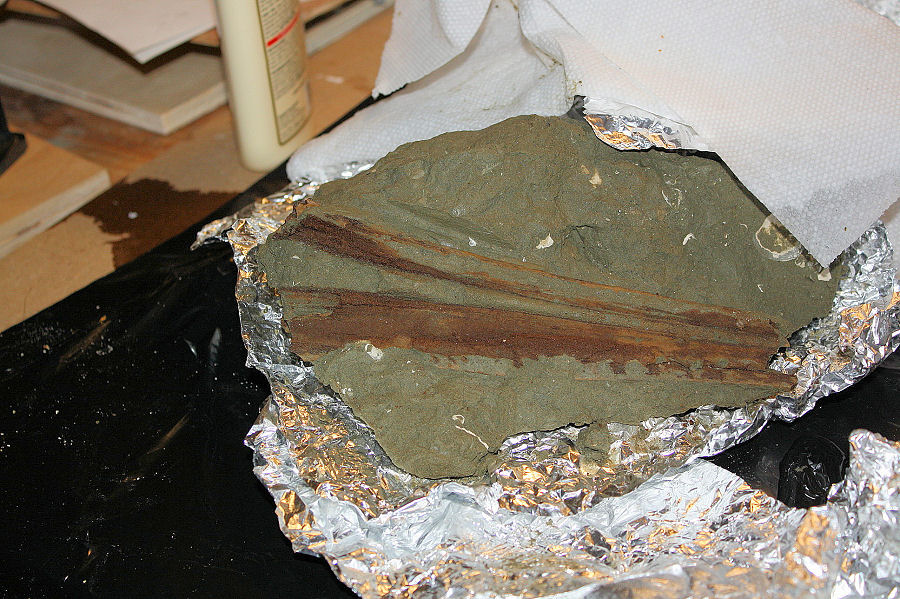
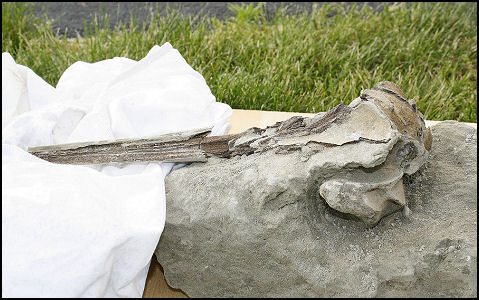
chunk of bone in a large half submerged chunk of marl. I
popped it out with my shovel and noticed just the hint of
more bone. Another jab and a section of marl gave way
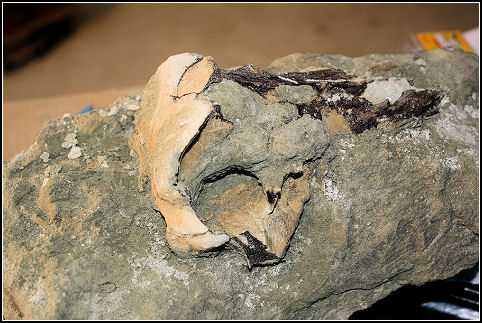
exposing the skull. The skull was right at the water line
and the waves were submerging it from time to time. With an
incoming tide we worked as fast as we could and removed it
in three separate blocks of marl. We carefully packed it up
and started the long hike back to the car.
Even before I started the process of prepping the skull
I decided to document and post the progress. Something just
a little different than just posting before and after
pictures.
A special thanks to Bob (JUSTBOB)* and Sue (HADDY) for
helping me extract and transport the skull. Both jumped
right in without being asked and the three of us worked as a
team to remove the skull as quickly and carefully as
possible under the difficult conditions.
Steve (BMOREFOSSILS) was the "go to" guy when it came
prepping the skull. This was a first for me and his
suggestions and guidance proved invaluable.
* screen names from The Fossil Forum
Identified by Dr. Stephen Godfrey
Curator of Paleontology
Calvert Marine Museum
The skull was carried out in three separate blocks of
marl.
At the end of a very long day, this portage back to the
car seemed to
take forever.
I kept these blocks moist until I could contact someone
with
expertise in dealing with something so fragile.
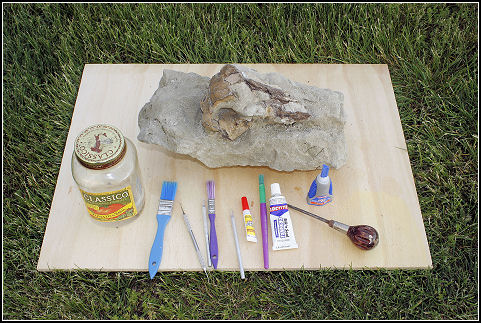
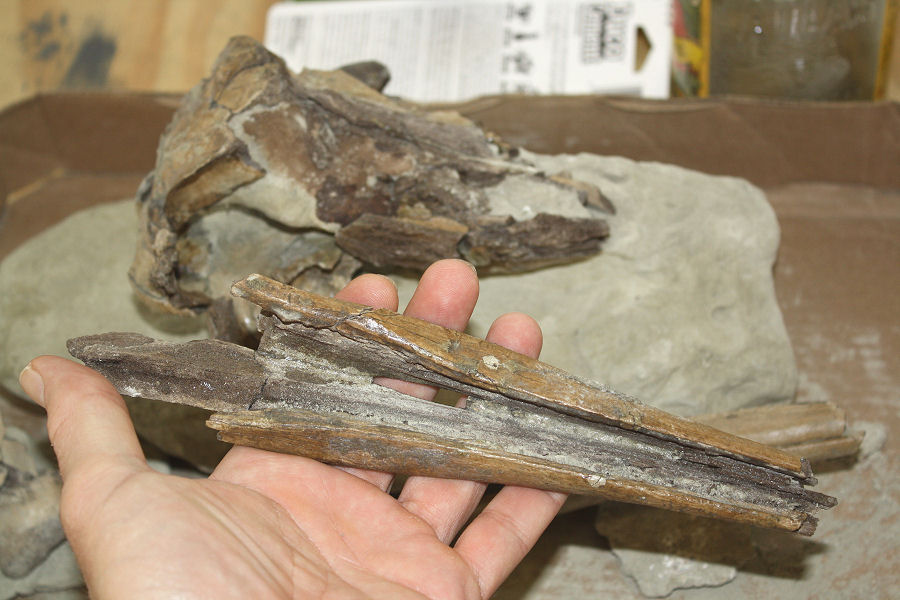
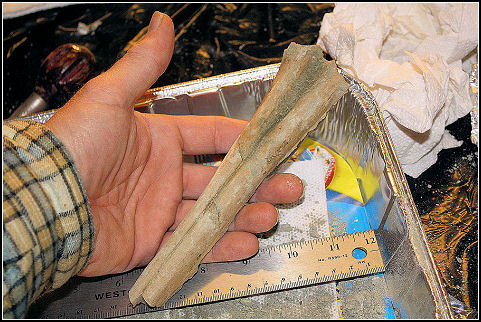
Tools of the trade
In the large jar is a PVA and alcohol solution, various
brushes, dental pic,
clay sculpting tools, awl, superglue ( regular and gel) and
a regular acetone based
glue.
Normally I find that the PVA and alcohol solution works very
well for most
of what we find in New Jersey (PVA is the main ingredient in
Elmer's glue) or a
solution of
Elmer's glue and water.
The super glue was recommended by someone who has prepped
several skulls and
given the fragile nature of some of bone it is was a wise
choice. The gel superglue was used
to fill and reinforce the cracks as they were discovered and to
glue the porous bone.
The first week was painfully slow, I was being extra
careful.
The bone is fragile and I found the crazy glue difficult to
work with at first.
Material should be completely dry before treating with any
preservative. If faced
with the situation where you must treat a wet specimen, use
the white Elmer's glue
it's water soluble.
week 1 - 05/05/11
Part of the upper jaw was the first significant piece to be removed from the
marl.
This piece seemed the easiest, few cracks and looked sturdy.
I purchased a couple of aluminum roasting/turkey (whatever)
pans to
help organize things.
05/11/11 - week two
Marl can retain moisture for a surprisingly long period of
time. I found that
by getting close to the bone allowed the marl to dry out
making removal
easier. This process speeded things up considerably.
05/11/11
Don't overlook using a bush to remove thin layers of marl.
This was another great tip from the expert Steve.
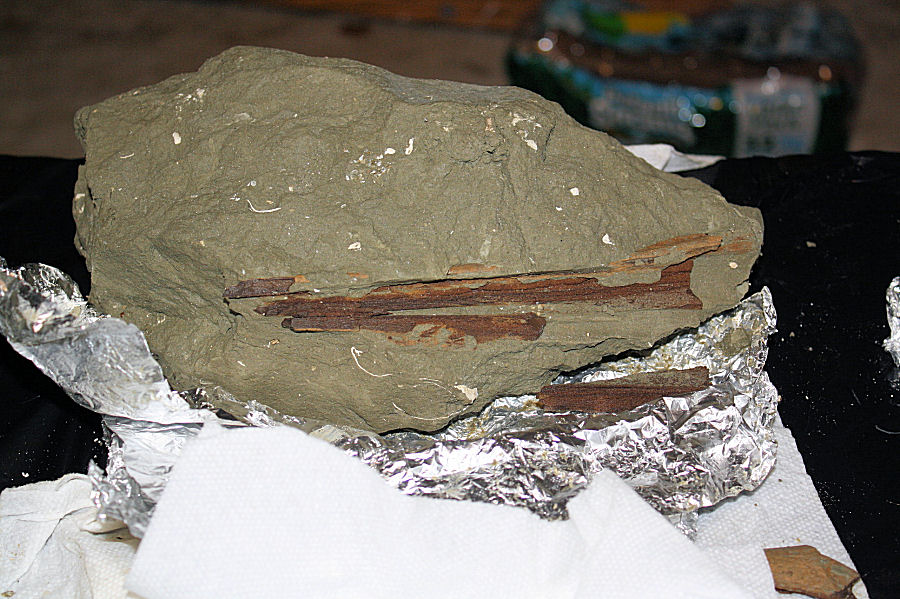
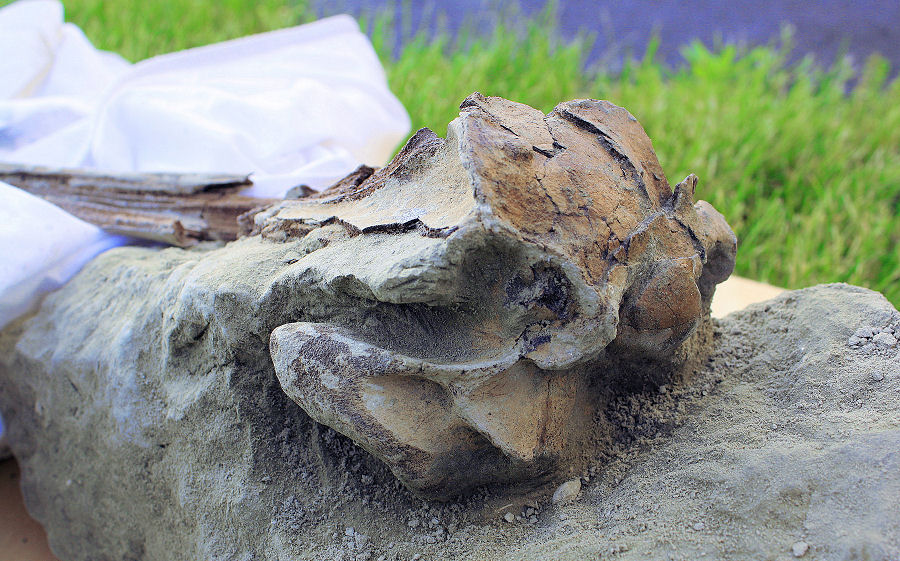
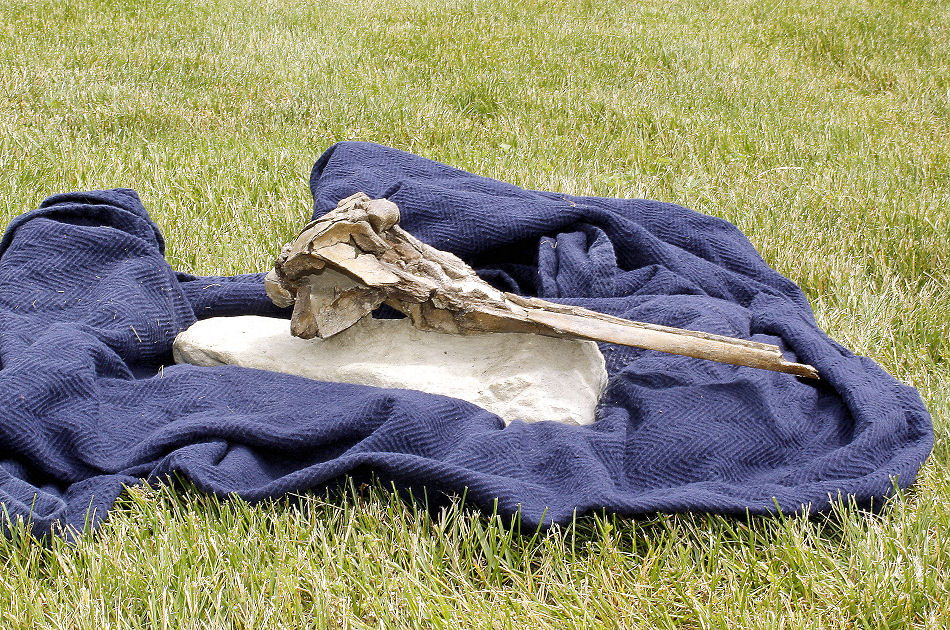
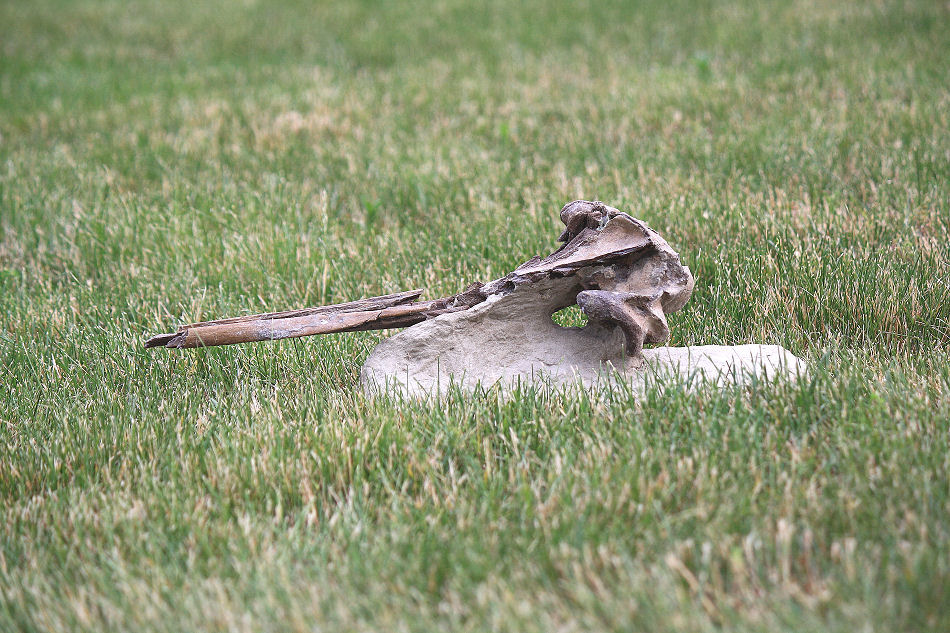
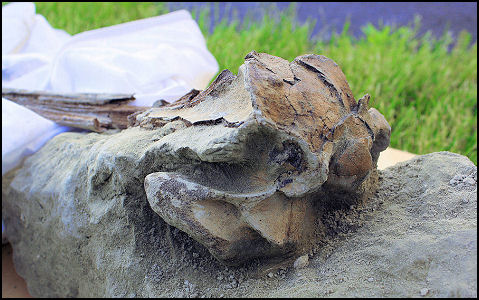
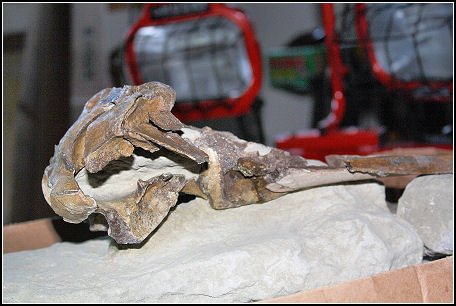
Progress as of 05/14/11
The skull will stay attached to the marl matrix. This is
simply my choice, I like
the way it looks and will give people a better feel for how
it was found and
transported out.
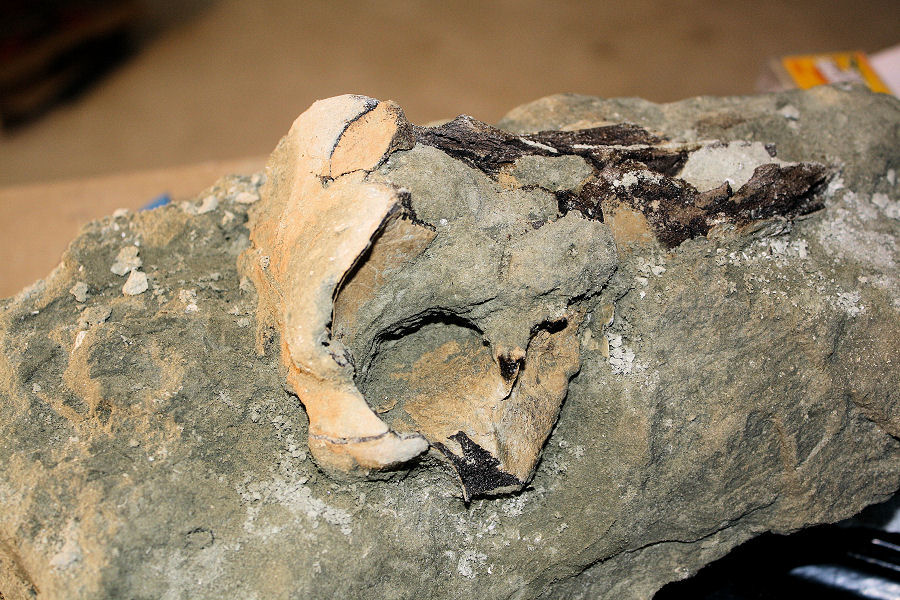
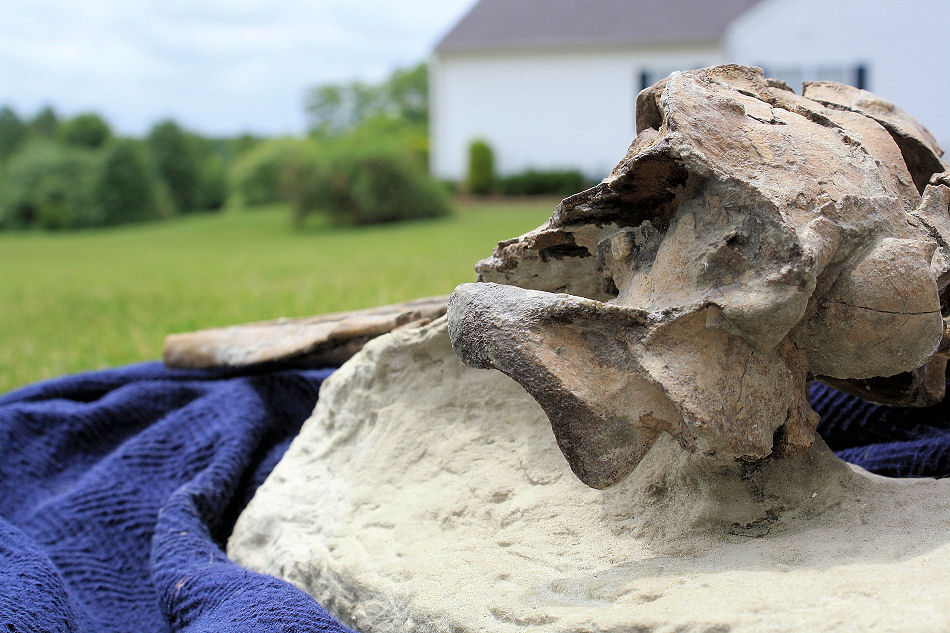
05/19/2011
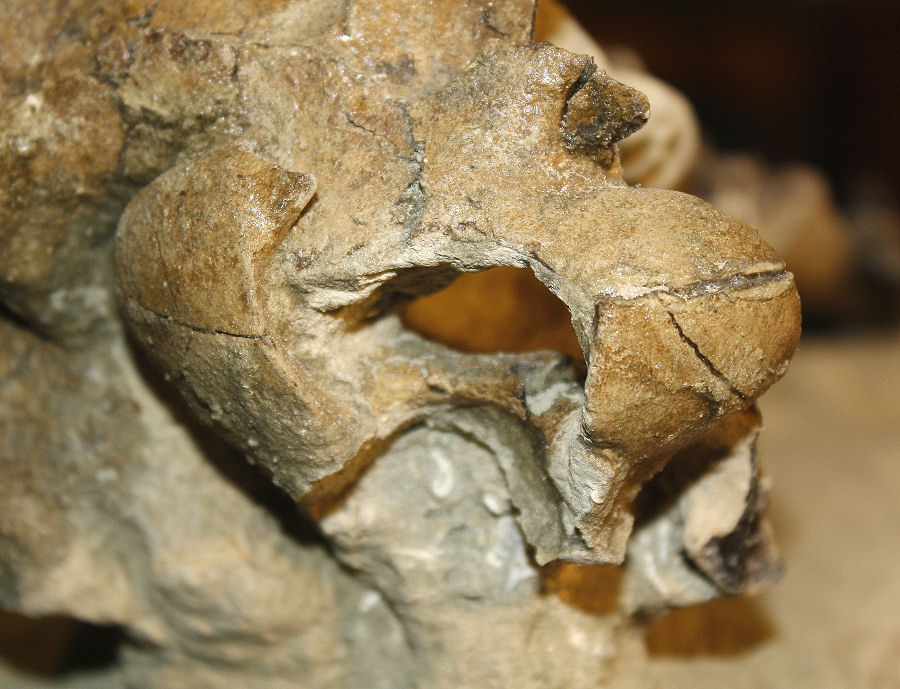
Left - Spinal cord entrance
Right - The white arrow show some new bone I exposed. This
still needs a coat of
superglue to harden it off.
I've started a second block of marl to support the upper jaw
section
Starting into week 4
Delicate fragments are given a coat of superglue prior to removing from
the marl.
Yikes, I goofed and glued part of the jaw wrong. Superglue
is not easily reversed. I've also managed to glue my
fingers to the tube not once but twice

End of the first month.
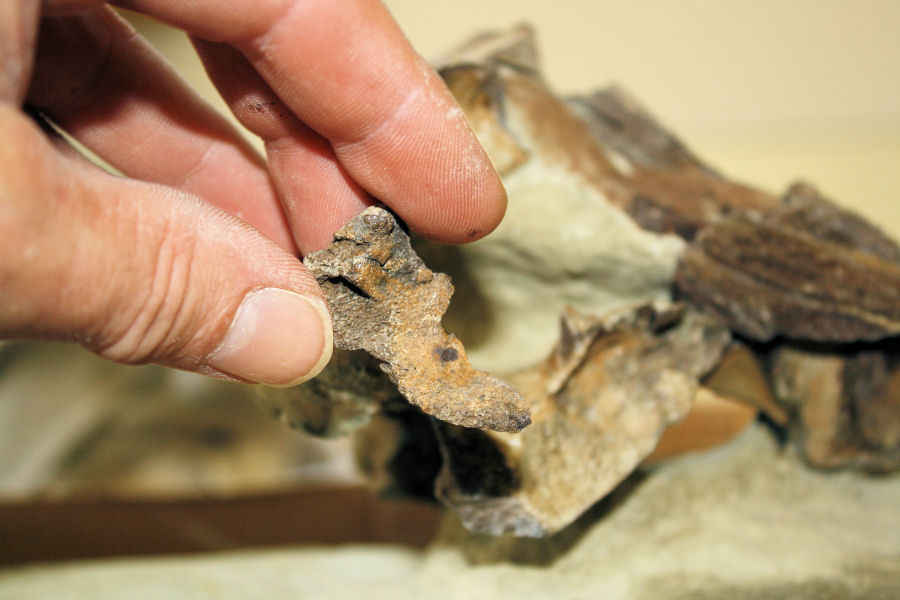
Sadly, there is a section of the skull missing. I'm guessing
that a section of marl
slipped into the water unnoticed.
I've started to harden off parts of the marl block, I'm
using a diluted PVA and
alcohol solution.
Time permitting, I should have the finished product in a few
weeks.
After a little more than a month there is light at the end
of tunnel.
All of the decent sized fragments have fit into place and
I've fixed my mistake
on the glue up of the upper jaw.
A little more work and I'll call complete.
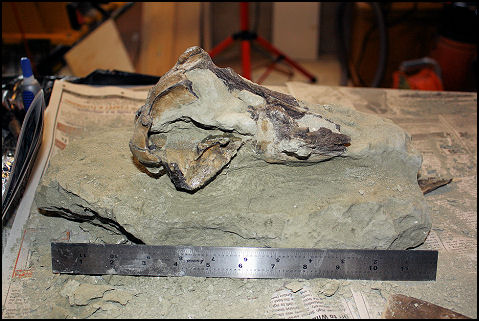
06/02/11
I'm calling it complete, a little over 5 weeks of work on
this critter.
Additional Photos
Left - beginning the process of carving out blocks of Marl
Right - packing everything up for what seemed to be an
endless hike back to
the car.
|